Pro Tip: When quality matters most (print, legal documents), use Preview’s Quartz filter or Word’s export. When you need the smallest possible file and the content is non-sensitive, a browser compressor with a “High” compression preset will get you further.
Key Takeaways
The fastest, most reliable way to shrink a PDF is to target images and fonts first, use a built-in method when privacy matters, and verify the output before you share it.
| Point | Details |
|---|---|
| Start with built-in tools | Use Preview on macOS or Word export on Windows before reaching for a third-party app. |
| Images and fonts drive file size | Downsampling high-res images and subsetting fonts produces the largest reductions. |
| Verify every compressed file | Open the output and check that links, forms, and images are intact. |
| No-upload tools protect sensitive files | For confidential documents, use local methods or a no-upload browser tool to keep data off third-party servers. |
| Fastsavemedia PDF Compressor | Free, browser-based, on-device compression with no sign-up and up to 90% size reduction. |
PDF compression at a glance
| Situation | Best method | Typical result |
|---|---|---|
| Mac, quality-sensitive document | Preview > File > Export > Quartz Filter “Reduce File Size” | Moderate reduction, file stays local |
| Windows, file originated in Word | File > Save As > PDF > Options > Minimum size | Large reduction for image-heavy decks |
| PDF with embedded objects | Ctrl+P > Microsoft Print to PDF | Attachments and layers stripped out |
| Any platform, no install, private file | On-device browser compressor | Up to 90% for image-heavy PDFs |
| Scanned document | Rescan at 150 DPI or run OCR first | Roughly a quarter of the image data per page |
| Text-only PDF | Any preset — expect diminishing returns | 5 MB may only reach about 3.5 MB |
Table of Contents
- How to compress a PDF on macOS using Preview
- How to reduce PDF file size on Windows without paid software
- Why do PDFs get so large, and what should you target first?
- How to hit a specific target size (say, 5 MB down to 1 MB)
- Handling scanned PDFs, OCR, and password-protected files
- Online compressors vs. offline methods: privacy, quality, and speed
- What Fastsavemedia’s PDF Compressor does and when to use it
- Pre-compress checklist: what to do before you hit Compress
- What most people get wrong about PDF compression
- Fastsavemedia’s PDF Compressor: free, private, and ready now
- Sources
How to compress a PDF on macOS using Preview
Apple documents this workflow directly: Preview is built into every Mac, requires no installation, and keeps your file entirely on your machine.
- Open the PDF in Preview (double-click or right-click > Open With > Preview).
- Go to File > Export (not “Export as PDF” — that skips the filter options).
- In the Format dropdown, choose PDF.
- Open the Quartz Filter dropdown and select Reduce File Size.
- Click Save, giving the compressed file a new name so you preserve the original.
Preview also exposes three additional options worth knowing: Optimize images for screen lowers image resolution to screen-appropriate DPI, Save images as JPEG re-encodes images in a lossy format for smaller output, and Create linearized PDF restructures the file so it loads page-by-page in a browser rather than waiting for the whole file. Use linearization when you’re publishing the PDF to a website.
The quality caveat is real. Apple’s own documentation warns that compressed results may be noticeably lower quality depending on the options chosen. If the degradation is too severe, try a milder approach — either skip the JPEG re-encoding option or use a browser tool that lets you choose a “Medium” preset instead of maximum compression.
How to reduce PDF file size on Windows without paid software
Windows doesn’t have a single built-in PDF compressor the way macOS does, but there are several practical paths that cost nothing.
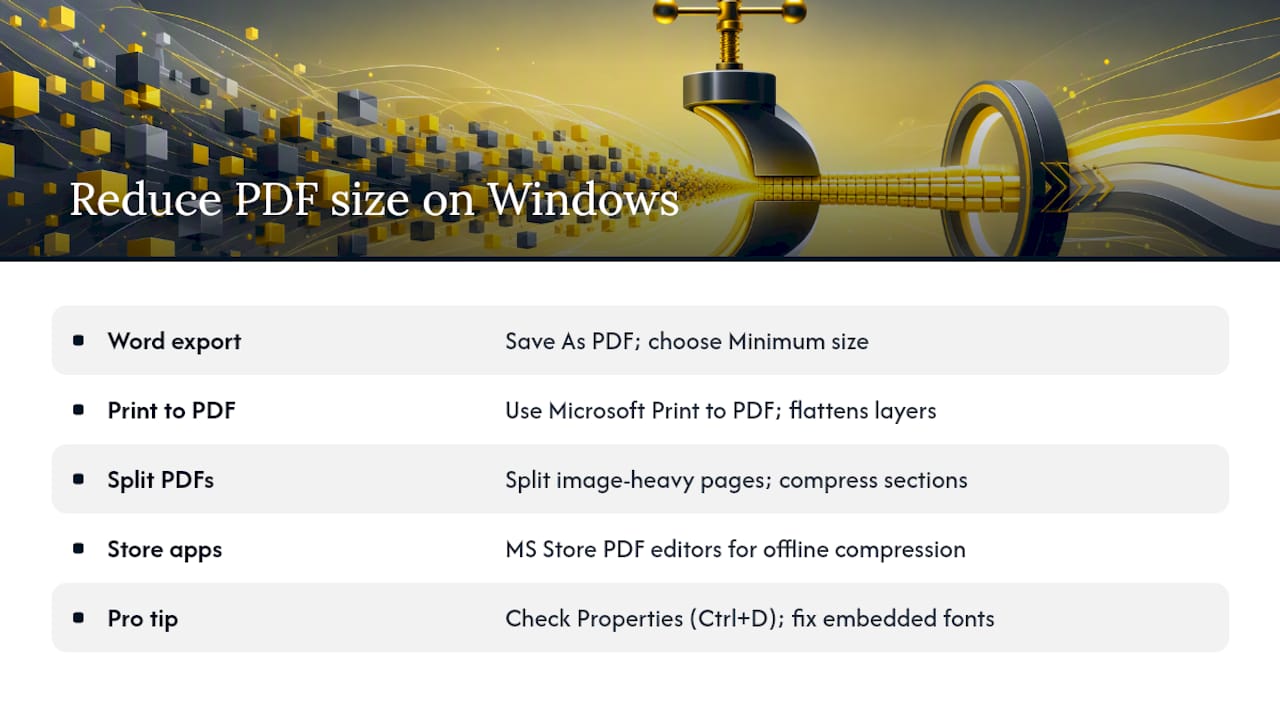
Microsoft Word export is the most accessible route if your PDF originated from a Word document or if you can open it in Word. Go to File > Save As, choose PDF from the format list, and before saving, click Options (or “More options”) and select Minimum size (publishing online).
Print to PDF is a different lever. Open the PDF in any viewer, press Ctrl+P, and choose “Microsoft Print to PDF” as the printer. This flattens interactive layers, removes embedded attachments, and re-renders the file. It’s especially useful when a PDF has embedded objects (spreadsheets, videos) inflating the size, since printing strips those out entirely.
Splitting large PDFs is worth considering when compression alone won’t hit your target. A 40-page report with 10 image-heavy pages and 30 text pages compresses unevenly — the text pages are already small. Split the file into sections using a tool like the Fastsavemedia Split PDF tool, compress each section at the appropriate level, then recombine. You end up with a much tighter result than applying one blanket compression setting to the whole document.
For a local app option, the Microsoft Store carries PDF editors with compression features, giving Windows users a no-browser alternative when they prefer offline processing.
Pro Tip: Before compressing, open the PDF and check the Document Properties (Ctrl+D in most viewers) to see embedded fonts and file metadata. Fonts with full embedding rather than subset embedding add significant weight — replacing or subletting them before export makes a measurable difference.
Why do PDFs get so large, and what should you target first?
High-resolution images and embedded fonts are the two main culprits behind bloated PDFs. Understanding which one is driving your file size tells you exactly where to apply pressure.
- High-resolution images are the biggest offender in most PDFs. A single 300 DPI photo embedded at print resolution can weigh 2–5 MB on its own. For screen or email use, 96–150 DPI is sufficient. Downsampling or converting images to JPEG before inserting them into the document yields better results than relying on automatic compression tools alone.
- Embedded fonts add weight when the full font file is included rather than just the characters used. Subset embedding (only the glyphs actually present in the document) is the lighter option. If you’re re-exporting from the source file, check your export settings for a “subset fonts” option.
- Attachments and embedded files — spreadsheets, audio clips, or other PDFs nested inside the document — can be invisible to a casual reader but add megabytes. Remove them before compressing.
- Unnecessary metadata (revision history, author comments, hidden layers) adds less weight than images but is worth clearing, especially for documents that have been edited many times.
- Unoptimized scanned pages are the worst case. A scanned document is essentially a stack of photos. Rescanning at 150 DPI instead of 300 DPI roughly quarters the image data per page.
Pro Tip: Use the Fastsavemedia PDF to JPG tool to extract image-heavy pages, downsample them externally, then reassemble the PDF. This gives you precise control over image quality that automatic compression presets can’t match.
How to hit a specific target size (say, 5 MB down to 1 MB)
Getting to a specific file size is less about finding the right button and more about working through the right sequence.
- Back up the original. Never compress the only copy. Rename the original with a “_original” suffix before you start.
- Identify the heavy pages. Open the PDF and note which pages contain large images or scanned content. Those are your compression targets.
- Downsample or replace large images. Extract images using a PDF-to-image tool, resize to 96–150 DPI for screen use, and re-insert. This step alone typically accounts for the largest size reduction in image-heavy files.
- Remove attachments and unused fonts. Check Document Properties for embedded files and font lists. Strip anything that isn’t essential.
- Re-export with a stronger compression preset. Use Preview’s Quartz filter on Mac, Word’s Minimum size export on Windows, or a browser compressor set to “High” compression. Adobe’s online compressor reports typical reductions of 50–80% for image-heavy files using its High/Medium/Low presets.
- Verify the output. Open the compressed file, check that hyperlinks still work, forms are intact, and images on the heaviest pages are still legible.
One honest caveat: text-only PDFs compress far less dramatically than image-heavy ones. A 5 MB document that’s mostly formatted text might only drop to 3.5 MB regardless of what you throw at it. Once images are already at low resolution, you’re hitting diminishing returns — pushing compression harder at that point just degrades text rendering without meaningful size gains.
Handling scanned PDFs, OCR, and password-protected files
Scanned PDFs and protected files need a slightly different approach before standard compression applies.
- Scanned PDFs are image stacks, not text documents. If you need searchable text, run OCR (optical character recognition) first using a local tool like Adobe Acrobat, or a free desktop app. For sensitive documents, prefer on-device OCR over uploading to a web service. If searchability isn’t required, simply rescanning at 150 DPI instead of 300 DPI will cut the file size substantially before you even touch a compressor.
- Password-protected PDFs require you to remove the password before most compression tools can process the file. Only do this when you own the document or have explicit authorization from the owner. An authorized unlock workflow removes the restriction so you can compress and, if needed, re-protect the file afterward.
- Restricted files (print-only, no-edit permissions) follow the same rule: do not bypass protections on documents you don’t have permission to alter. One sentence covers the legal reality here — circumventing document restrictions you don’t own or have authorization to remove is a violation of the document owner’s rights and potentially of applicable law.
- After compressing a previously protected PDF, use a PDF protection tool to re-encrypt it before sharing.
Online compressors vs. offline methods: privacy, quality, and speed
The choice between a browser tool and a local method comes down to what you’re compressing and how sensitive the content is.
Online tools offer genuine advantages: better compression presets, no software to install, and often higher compression ratios for image-heavy files. The trade-off is that your file travels to a third-party server. For a non-sensitive brochure or a public-facing report, that’s usually acceptable. For contracts, medical records, or anything with personal data, it’s a risk worth avoiding.
Pro Tip: For documents containing personal information, financial data, or anything under NDA, use a local method (Preview on Mac, Word export on Windows) or a no-upload browser tool. Save the upload-based compressors for public or non-sensitive files where maximum compression matters more than data control.
What Fastsavemedia’s PDF Compressor does and when to use it
The Fastsavemedia PDF Compressor is a browser-based tool that processes your file locally on your device, meaning the PDF never leaves your machine. No account, no upload, no waiting for a server response.
Key features:
- On-device processing — compression runs in your browser, not on a remote server
- Up to 90% file size reduction for image-heavy PDFs
- Support for PDFs with embedded images and scanned pages
- No sign-up required — open the page and start immediately
To use it: visit the PDF Compressor page, drag your file into the tool, select your compression level, and download the result. Then open the compressed file and spot-check a page with images to confirm quality is acceptable.
Fastsavemedia’s suite of 60+ free browser tools is built around the same no-upload principle across every tool, which makes it a consistent choice when you’re working with files you’d rather not hand to a third party.
Choose this tool over built-in OS methods when you’re working across platforms (Windows, Mac, iOS, Android), when you need a quick result without opening Word or Preview, or when you want to compress multiple files in a session without installing anything.
Pre-compress checklist: what to do before you hit Compress
Run through this before compressing any PDF, especially one you can’t easily recreate.
- Back up the original. Save a copy with a clear filename before touching anything.
- Remove unnecessary pages. Use an organize PDF tool to delete blank pages, duplicate pages, or sections that don’t need to be in the final file.
- Strip attachments and embedded objects. Check Document Properties for anything nested inside the file that isn’t visible content.
- Check embedded fonts. If the source file is available, re-export with subset font embedding rather than full embedding.
- Decide your quality floor. Email and web delivery can tolerate 96–150 DPI images. Print requires 300 DPI. Know which applies before choosing a compression level.
- Confirm the output. After compressing, open the file and verify that hyperlinks resolve, form fields are functional, and the most image-heavy page still looks acceptable.
What most people get wrong about PDF compression
The biggest mistake is treating compression as a one-step fix. You drag the file in, hit compress, and assume the result is fine. Two problems show up later: the images are unreadably blurry, or the file is barely smaller because the PDF was mostly text to begin with.
The second common error is over-compressing a scanned document. Scanned PDFs are already images — applying maximum compression to a file that’s already a set of low-res JPEGs produces a muddy, pixelated result with almost no size benefit. The right move is to address the source (rescan at a lower DPI, or use OCR to convert to a true text PDF) rather than hammering the output.
Two habits that actually help: always test compression on a single representative page before processing the full document, and keep a versioning habit when you compress iteratively. Name files with a suffix like “_v1_compressed” so you can always roll back without hunting for the original.
Linearized PDFs are worth mentioning here because most guides skip them entirely. A linearized PDF is structured so the first page loads immediately in a browser while the rest downloads in the background. If you’re publishing a PDF to a website, linearization improves perceived load time without any quality loss. Preview’s Export dialog includes this option; use it whenever the PDF is going online.
Fastsavemedia’s PDF Compressor: free, private, and ready now
Skip the software installs and the server uploads. The Fastsavemedia PDF Compressor compresses your file directly in your browser, with no account and no file transfer to a remote server. For anyone who just compressed a PDF and wants to handle related tasks, the same platform covers video compression and dozens of other file utilities, all under the same no-upload model.
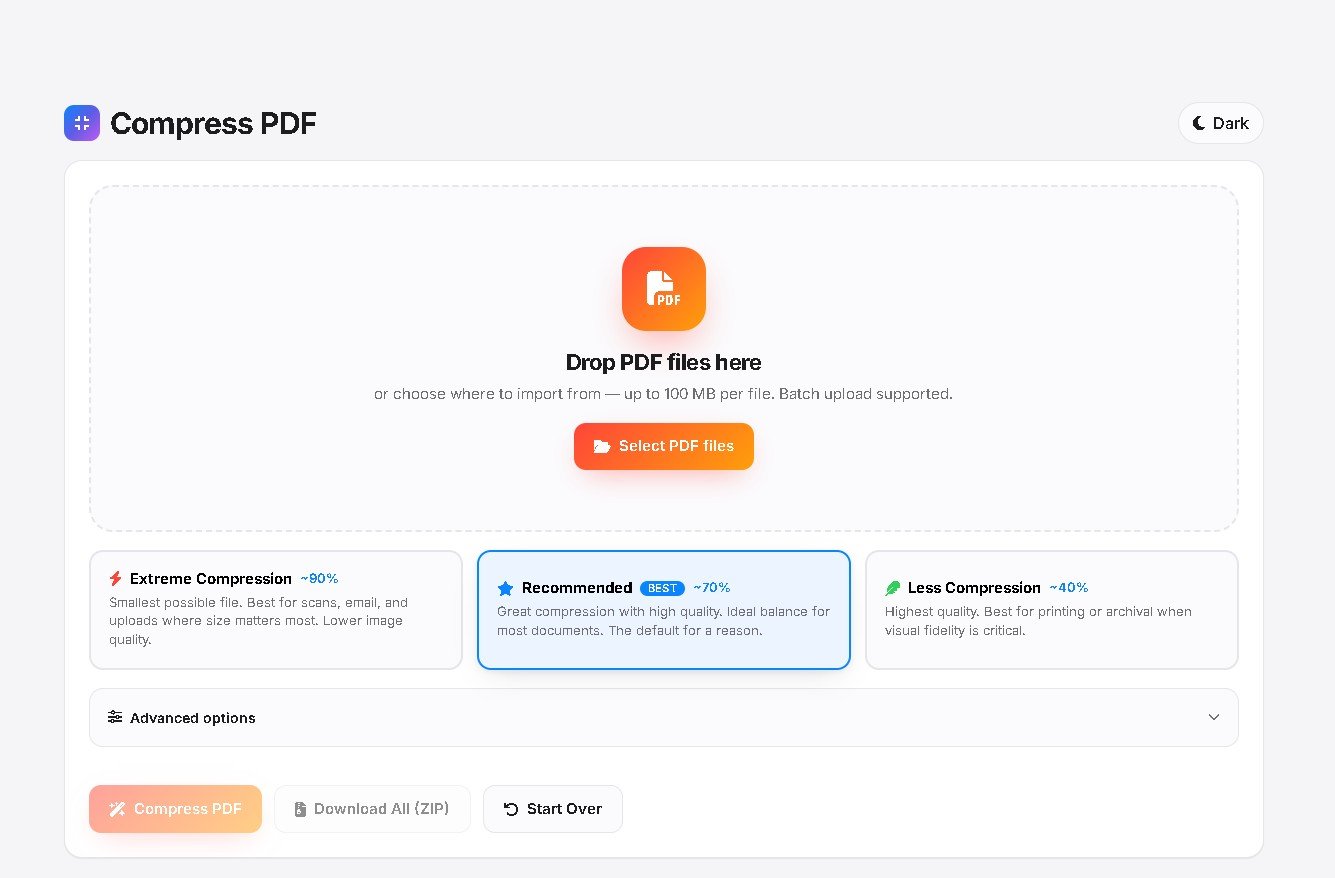
Open the PDF Compressor, drop in your file, choose your compression level, and download the result in seconds. Your file stays on your device the entire time.
Sources
- Reduce the size of a PDF in Preview on Mac - Apple Support
- PDF Compressor: Compress PDF files online | Canva
Recommended
- PDF Compressor – Reduce PDF File Size Online Free (Up to 90%) | FastSaveMedia
- Compress Video Online Free Without Losing Quality — Reduce MP4 File Size, No Upload | FastSaveMedia
- PDF to JPG Converter – Convert PDF Pages to High-Quality JPG Free Online | FastSaveMedia
- Protect PDF – Password Protect & Encrypt PDF Free Online | FastSaveMedia
Frequently Asked Questions
How do I compress a PDF for free?
On macOS, open the PDF in Preview, choose File > Export, set the Quartz Filter to "Reduce File Size" and save under a new name. On Windows, open the file in Microsoft Word and use File > Save As > PDF with the "Minimum size (publishing online)" option, or print it with "Microsoft Print to PDF". In any browser, the FastSaveMedia PDF Compressor compresses the file on your device with no upload and no sign-up.
How do I compress a PDF on a Mac without extra software?
Preview is built into every Mac. Open the PDF, go to File > Export (not "Export as PDF"), pick PDF as the format, choose the Quartz Filter "Reduce File Size", then Save with a new filename. Extra options include "Optimize images for screen", "Save images as JPEG" and "Create linearized PDF" — the last one is worth enabling whenever the PDF will be published on a website.
How can I reduce PDF file size on Windows without paid software?
Three no-cost paths: export from Microsoft Word with the "Minimum size (publishing online)" option; open the PDF in any viewer and print it to "Microsoft Print to PDF", which flattens layers and strips embedded attachments; or use a browser-based compressor. Splitting a long document and compressing image-heavy sections separately beats one blanket setting.
Why is my PDF so large?
High-resolution images and embedded fonts are the two main causes. A single 300 DPI photo can weigh 2–5 MB, while 96–150 DPI is enough for screen or email. Full font embedding is heavier than subset embedding, and hidden attachments, revision metadata and unoptimized scanned pages add further weight.
How do I get a 5 MB PDF down to 1 MB?
Back up the original, identify the image-heavy pages, downsample those images to 96–150 DPI, remove attachments and unused fonts, re-export with a strong compression preset, then verify links, forms and image legibility. Image-heavy files typically drop 50–80%; a text-only PDF may only fall from 5 MB to about 3.5 MB no matter what you use.
Is it safe to compress a confidential PDF online?
Upload-based compressors send your file to a third-party server, which is fine for public brochures but risky for contracts, medical records or anything with personal data. For sensitive documents use a local method (Preview on Mac, Word export on Windows) or a no-upload browser tool that processes the file on your own device.
How do I compress a scanned or password-protected PDF?
A scanned PDF is a stack of images: run OCR first if you need searchable text, or simply rescan at 150 DPI instead of 300 DPI to cut size before compressing. A password-protected PDF must have the password removed before most compressors can read it — only do that on documents you own or are authorized to modify, and re-encrypt the compressed file before sharing.