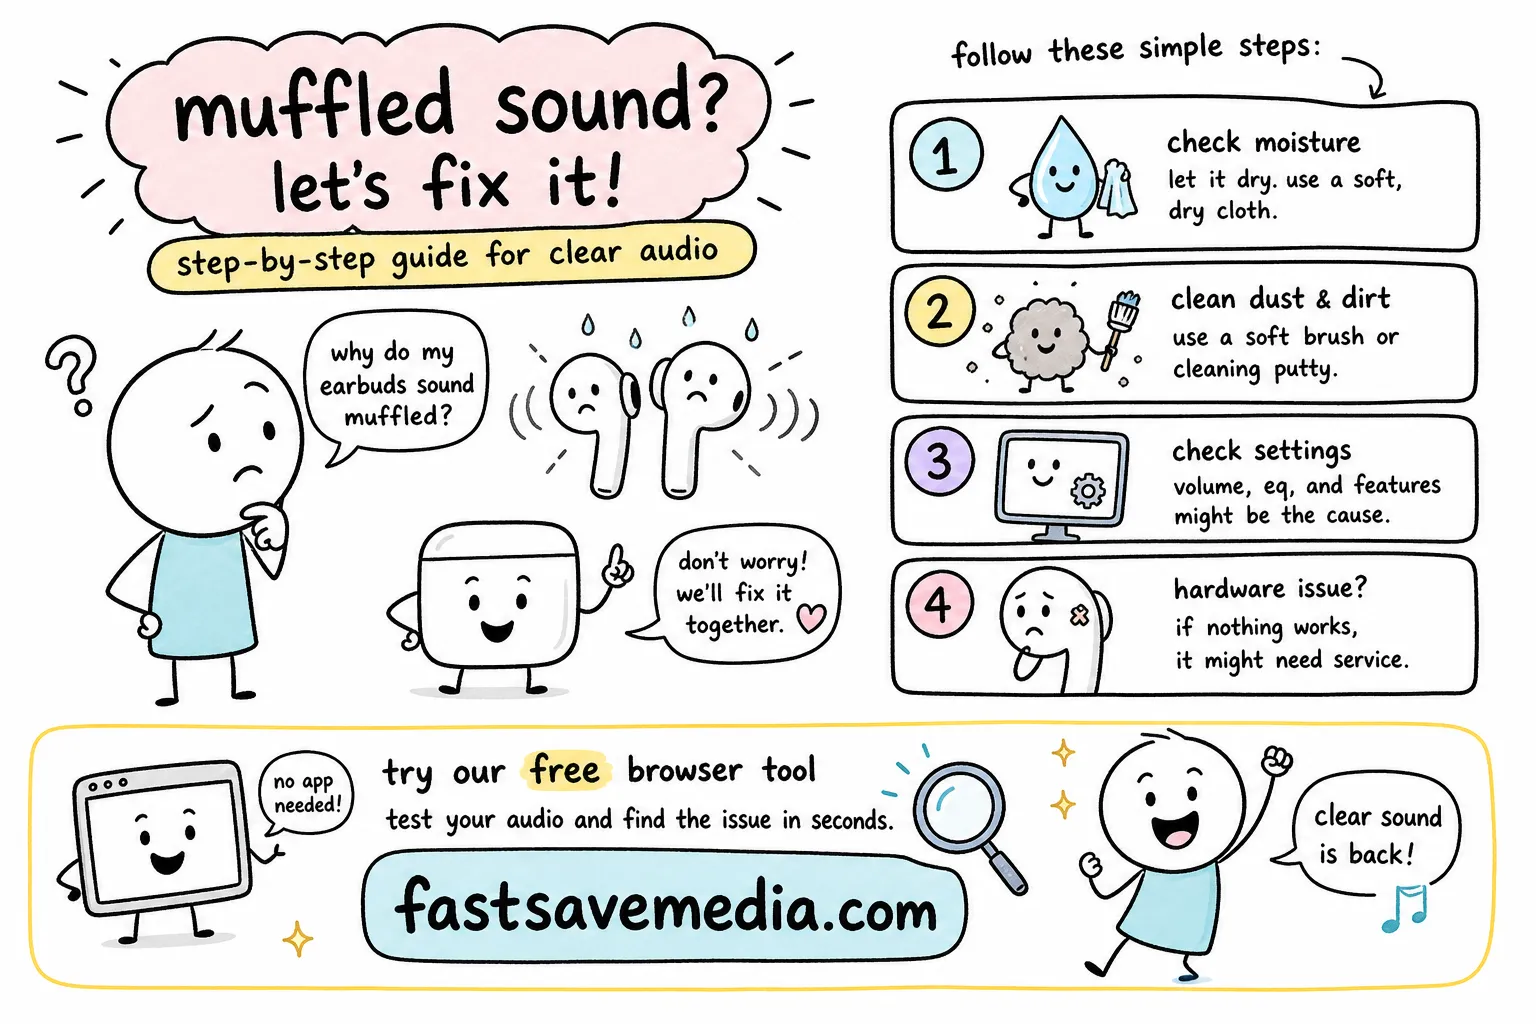
- Muffled AirPods have 3 root causes: moisture, debris, or software/hardware — fix in that order.
- A tone at 165–175 Hz physically ejects water through the mesh — the free Fix My Speaker by FastSaveMedia tool has a small-driver preset tuned for AirPods.
- Clean the mesh with a soft toothbrush + micellar water, blot on a paper towel. Never use alcohol on the mesh, cotton buds or sharp tools.
- iPhone settings silently muffle AirPods: check L/R Balance, EQ, Mic Mode and Headphone Accommodations.
- If only one AirPod stays muffled after cleaning + fit test, it is a unit-level hardware fault — Apple's AirPods Pro Service Programme ended in October 2025.
One earbud sounds like it is wrapped in cotton wool. The other is fine. Or both AirPods sound distant and flat, and you only notice it on the commute home after a sweaty gym session. That muffled, deadened quality is one of the most common AirPods complaints, and this AirPods muffled fix guide covers every practical solution in the order most likely to solve your problem fastest. The good news: most cases are fixable at home without spending a single rupee.
The three root causes are moisture, debris, and software or hardware issues. Each has a different fix, so if you already suspect what is going on, jump directly to that section. If you are not sure, start at the top and work your way down.
The fastest-fix-first order matters here. Most people solve the problem in the first two sections. The later sections exist for cases that survive those initial steps.
| Symptom | Likely cause | First fix |
|---|---|---|
| Muffled right after a workout or rain | Moisture in speaker cavity | 165–175 Hz tone (Fix My Speaker) |
| Gradually muffled over weeks | Earwax or debris on mesh | Soft toothbrush + micellar water |
| Bass gone, everything flat & distant (AirPods Pro) | Poor ear-tip seal | Ear Tip Fit Test, swap tip size |
| Muffled after iOS update | Voice Isolation / EQ / Headphone Accommodations | Reset each iPhone setting |
| Intermittent, cuts in & out | Partial multi-device Bluetooth connection | Forget This Device & re-pair |
| Crackling/distortion at low volume | Physical driver damage | Apple Support / replacement earpiece |
AirPods muffled fix, start here: flush out moisture with sound waves
Why moisture is the most common culprit for muffled AirPods sound
Sweat from a workout, light rain, or even high humidity can condense inside the AirPods speaker cavity and dampen the driver. That immediately reduces high-frequency response, which is why everything sounds flat rather than crisp. Unlike a chunk of earwax, moisture can shift on its own as the AirPods dry out. So if the muffled sound appeared after exercise and faded a few hours later, moisture is almost certainly responsible, not a hardware fault.
How sound-wave ejection works on small earphone drivers
A precisely calibrated low-frequency tone drives the speaker cone to vibrate at maximum excursion, which physically overcomes the surface tension holding water droplets against the mesh. The diaphragm acts like a tiny pump, pushing trapped liquid outward through the grille. Small drivers like those inside AirPods respond best to frequencies between 165 Hz and 175 Hz, where they produce the highest amplitude output without hitting power limits. This is the same principle behind the water-lock feature on Apple Watch, and you can replicate it right now in a browser without any app.
Using Fix My Speaker to clear your AirPods in under a minute
Fix My Speaker by FastSaveMedia is a free, browser-based tool that synthesises sound waves in real time using the Web Audio API. It has a dedicated small-driver preset tuned specifically for earphones like AirPods, delivering precise frequency accuracy without the resampling drift you get from playing an MP3 file. Open it on any device, select the small-driver preset, play it directly through your AirPods, and let it run for two to three cycles. No app download, no account, no cost. It works on Safari on iPhone, making it the fastest possible first step before you invest time in deeper troubleshooting. Run it at this point, then continue reading.
AirPods muffled fix: how to safely clean the speaker mesh
Tools to gather before you start
You need a soft-bristled children's toothbrush, micellar water containing PEG-6 Caprylic/Capric Glycerides (brands like Bioderma or Neutrogena work well), distilled water, paper towels, and optionally a small piece of fresh sticky tack for stubborn wax. Apple's official guidance specifically warns against cotton buds pressed deep into the mesh, sharp tools, and isopropyl alcohol applied directly to the mesh surface. These can push debris further into the driver or damage the grille structure, so stick to the approved list.
The micellar water method step by step
Saturate the toothbrush in micellar water, hold the AirPod with the mesh facing up, and brush in small circles for about 15 seconds. Immediately flip the AirPod and blot the mesh firmly onto a paper towel, ensuring direct contact between mesh and towel so capillary action pulls the loosened debris out. Repeat this cycle three times, then do a final rinse pass with distilled water using the same motion. Air dry for at least two hours before placing the AirPods back in the case. This step alone can restore AirPods volume that debris has been quietly suppressing for weeks.
Removing stubborn earwax with sticky tack
Roll a small piece of fresh sticky tack smaller than a pea, press it gently onto the mesh, and pull it straight off without twisting or dragging sideways. Repeat with fresh pieces until no yellow or brown residue transfers onto the tack. Finish with a light dry brush pass to remove any loose fibres, then move on to the drying step. This method is particularly effective for older AirPods with packed-in wax that the toothbrush alone cannot dislodge. Once the mesh is clear, run Fix My Speaker again to flush any remaining trapped moisture before reassembling.
| Method | Verdict | Why |
|---|---|---|
| Soft children's toothbrush + micellar water | ✅ Safe | Lifts wax without saturating the driver |
| Fresh sticky tack (pressed & pulled straight) | ✅ Safe | Removes packed wax cleanly, no residue |
| Distilled water rinse pass | ✅ Safe | Neutralises micellar residue, dries clean |
| Isopropyl alcohol directly on the mesh | ❌ Unsafe | Can seep past mesh & damage the driver |
| Cotton buds pushed deep into the mesh | ❌ Unsafe | Compacts wax further into the driver |
| Toothpicks, needles or SIM ejectors | ❌ Unsafe | Tears the mesh permanently |
| Compressed air blast into the grille | ❌ Unsafe | Can rupture the internal diaphragm |
iPhone settings that silently muffle your AirPods
Check audio balance and EQ first (they are often overlooked)
Go to Settings > Accessibility > Audio/Visual and confirm the Left-Right Balance slider is centred at 0.0. Even a slight shift to one side makes the quieter earbud seem muffled, and this setting gets bumped accidentally more often than people realise. While you are in Settings, go to Music > EQ and set the equaliser to Off. Presets like “Late Night” or “Spoken Word” cut the high frequencies that make audio sound crisp, and they remain active even after you switch apps, which causes genuine confusion about why music sounds dull.
Mic Mode and Headphone Accommodations
During a call, open Control Centre and tap Mic Mode. Switch it to Standard if it is currently set to Voice Isolation. Voice Isolation aggressively strips background frequencies and can make your voice sound unnatural to callers; many people describe this as the AirPods microphone sounding muffled or thin. Under Settings > Accessibility > Audio/Visual > Headphone Accommodations, toggle it off temporarily to test whether custom tuning is dampening your playback audio. These two settings account for a notable share of muffled-sound complaints that appear after an iOS update, particularly on AirPods Pro muffled cases that surface immediately post-upgrade.
When to reset your AirPods entirely
If adjusting individual settings does not restore clarity, a full factory reset often clears firmware glitches that silently alter audio output. Here is how to do it:
- Place your AirPods in the case, close the lid, and wait 30 seconds.
- Open the lid, then go to Settings > Bluetooth.
- Tap the Info icon next to your AirPods and choose Forget This Device.
- With the lid open, hold the setup button on the back of the case until the status light flashes amber and then white, this takes about 15 seconds.
- Re-pair fresh and test audio immediately.
Bluetooth resets and firmware checks that restore audio
Forget and re-pair your AirPods
When AirPods are connected to multiple devices, they sometimes maintain a partial connection to a secondary device, which routes audio inconsistently and produces muffled or intermittent sound. This is particularly common if you use the same AirPods with both an iPhone and a MacBook. Go to Settings > Bluetooth, tap the Info icon next to your AirPods, and choose Forget This Device. Then re-pair fresh from the case to ensure a clean, single-device connection.
Verify AirPods firmware is current
Outdated firmware has been linked to active noise cancellation behaving erratically and reducing perceived volume. Check the current firmware version under Settings > General > About > AirPods. Firmware updates install automatically when AirPods are charging in the case and within Bluetooth range of a connected iPhone, so if yours is outdated, leave them charging overnight near your phone rather than trying to force an update manually.
Rule out interference from nearby devices
Wi-Fi routers, microwave ovens, and other Bluetooth devices operating on the 2.4 GHz band can cause dropouts that sound exactly like muffled audio. Move away from those sources and test audio in an open space before concluding there is a hardware issue. If the sound improves when you step outside or move to a different room, interference is your answer, not a damaged driver.
Fit issues vs. hardware failure: how to tell the difference
Run the Ear Tip Fit Test (AirPods Pro)
Go to Settings > Bluetooth, tap the Info icon next to your AirPods Pro, and select Ear Tip Fit Test. A poor seal is one of the most common reasons AirPods Pro sound muffled: it eliminates bass response entirely and makes everything sound flat and distant. The test plays a short tone and tells you whether the seal is good or sub-optimal. Switching to a larger or smaller silicone tip often solves the problem in seconds, and you may need different sizes for your left and right ears.
Isolate which unit has the fault
Remove one AirPod and test audio with only the other in your ear, then swap. If only one side sounds muffled after cleaning and after passing the fit test, that specific unit has a hardware fault rather than a settings or debris issue. If both sides are equally muffled after all previous steps, the problem is more likely systemic: a software setting, a firmware bug, or physical driver damage from a significant impact. This single test is the clearest way to distinguish a unit-level failure from a system-level problem.
Signs that indicate physical driver damage
Persistent crackling or distortion at low volumes points strongly to a damaged driver rather than moisture or debris. Sound that remains muffled even at maximum volume, or muffling that appeared immediately after a drop or impact, reinforces that conclusion. These cases do not respond to any airpods muffled fix involving cleaning or settings changes. If you can reproduce the distortion consistently at low to medium volume levels, that is strong evidence of mechanical damage to the speaker cone itself.
When to contact Apple Support
Apple's service programme and warranty coverage
Apple previously ran an AirPods Pro Service Programme for Sound Issues, which covered first-generation AirPods Pro manufactured before October 2020 for crackling and ANC failures. That programme ended in October 2025, so it no longer covers new claims. Standard AirPods carry a one-year limited warranty, and AppleCare+ extends this coverage while also covering accidental damage at a fixed service fee, almost always cheaper than buying a new set. Check Apple's website with your serial number to confirm your current coverage status.
Making the repair-vs-replacement call
If your AirPods are within warranty and the issue is confirmed as hardware, service is free or low cost. Contact Apple Support online, by phone, or at an Apple Authorised Service Provider in India. Out-of-warranty units with a single faulty earbud can often be replaced as individual earpieces rather than as a full set, which significantly reduces the cost compared to buying new AirPods entirely.
| Situation | Best path | Typical outcome |
|---|---|---|
| In warranty (< 1 year) & hardware fault | Apple Authorised Service Provider | Free replacement of faulty earpiece |
| AppleCare+ active | Apple Support (online / phone) | Fixed service fee, incl. accidental damage |
| Out of warranty, one faulty earbud | Single-earpiece replacement | Cheaper than buying a new set |
| 1st-gen AirPods Pro (pre-Oct 2020) crackling | Service programme ended Oct 2025 | Standard paid service only |
| Muffled & passes cleaning/fit test on one side only | Book service — unit-level fault confirmed | Diagnosis matches Apple's repair criteria |
Quick Fix Order Checklist
- Diagnose: match your symptom in the table above (moisture, debris, settings, Bluetooth, fit, hardware).
- Moisture: run Fix My Speaker by FastSaveMedia — small-driver preset, 2–3 cycles.
- Debris: soft toothbrush + micellar water → blot on paper towel → distilled water rinse → 2 hr air dry.
- iPhone settings: centre L/R Balance, set EQ to Off, Mic Mode to Standard, toggle Headphone Accommodations off.
- Bluetooth: Forget This Device → re-pair; check firmware; move away from 2.4 GHz interference.
- Fit & isolation: Ear Tip Fit Test (Pro); swap earpieces to identify a unit-level fault.
- Apple Support: only if a single unit stays muffled or distorts at low volume after all above steps.
Wrap-up
Work through the fixes in this order: sound-wave ejection first, then physical cleaning, then settings checks, then Bluetooth resets, then a fit test, and finally Apple Support if nothing else works. The vast majority of muffled AirPods cases resolve before you ever reach the hardware diagnosis stage, because moisture and earwax account for most of the problem. This airpods muffled fix guide is designed so that each step rules out one root cause before you move to the next.
If you have not already done so, run Fix My Speaker by FastSaveMedia now, it takes under a minute and works directly in your browser at no cost. For moisture-related muffling, which is the single most common cause, it often solves the problem entirely on the first run.
AirPods sound muffled right now? Clear them in under 60 seconds — no app, no signup, works on any iPhone, iPad or Mac browser.
Try Fix My Speaker by FastSaveMedia (Free)Frequently Asked Questions
Why do my AirPods sound muffled all of a sudden?
In roughly 80% of cases the cause is moisture (from sweat, rain or humidity) or earwax and debris blocking the speaker mesh. If it started after a workout or in the rain, moisture is the likely cause — run a 165–175 Hz tone with Fix My Speaker by FastSaveMedia for 60 seconds to eject it. If it built up gradually over weeks, clean the mesh with a soft toothbrush and micellar water.
What frequency ejects water from AirPods?
Small earphone drivers like those in AirPods respond best to a tone between 165 Hz and 175 Hz. At that frequency the diaphragm reaches maximum excursion and physically pushes water droplets through the mesh — the same principle Apple Watch uses for its Water Eject feature. Fix My Speaker by FastSaveMedia has a dedicated small-driver preset tuned to this range.
How do I clean the mesh on muffled AirPods safely?
Use a soft-bristled children's toothbrush lightly saturated with micellar water (Bioderma or Neutrogena). Brush the mesh in small circles for 15 seconds, then blot firmly onto a paper towel so capillary action pulls debris out. Repeat three times, finish with a distilled water rinse pass, and air dry for at least 2 hours before charging. Never use isopropyl alcohol directly on the mesh, cotton buds pushed deep into the mesh or any sharp tool.
Which iPhone settings can make AirPods sound muffled?
Four settings commonly cause muffled audio. Settings > Accessibility > Audio/Visual > Left-Right Balance must be centred at 0.0. Settings > Music > EQ presets like Late Night or Spoken Word cut highs — set it to Off. Control Centre > Mic Mode should be Standard, not Voice Isolation, during calls. And Headphone Accommodations under Accessibility > Audio/Visual can dampen playback — toggle it off to test.
How do I reset AirPods to fix muffled sound?
Place the AirPods in the case, close the lid and wait 30 seconds. Open the lid and go to Settings > Bluetooth. Tap the Info icon next to your AirPods and choose Forget This Device. With the lid open, hold the setup button on the back of the case until the status light flashes amber then white (about 15 seconds). Re-pair fresh and test audio immediately.
How do I tell if only one AirPod is faulty or if both are muffled?
Remove one AirPod and test audio with only the other in your ear, then swap. If only one side sounds muffled after cleaning and after passing the Ear Tip Fit Test (AirPods Pro), that specific unit has a hardware fault. If both sides sound equally muffled, the cause is systemic — a software setting, firmware bug or driver damage from impact — not a single-unit failure.
Does the AirPods Pro Service Programme still cover muffled sound issues?
No. Apple's AirPods Pro Service Programme for Sound Issues, which covered first-generation AirPods Pro manufactured before October 2020 for crackling and ANC failures, ended in October 2025 and no longer accepts new claims. Standard AirPods carry a one-year limited warranty, and AppleCare+ extends coverage and includes accidental damage at a fixed service fee — check your serial number on Apple's website to confirm current coverage.