
What Is a Gray Uniformity Test?
Fills screen with 50% gray to reveal brightness inconsistencies.
Common Issues
- Backlight bleed
- Clouding/mura
- IPS glow
- Hotspots
Why Should You Run This Test?
A gray uniformity test reveals backlight bleed, clouding, hotspots, and IPS glow, issues that are invisible on colorful content but distracting during dark scenes in movies, games, or photo editing. If your screen looks unevenly lit, this test confirms and localizes the problem.
Common Symptoms
- Dark movie scenes show bright patches in corners or edges
- Photo editing reveals brightness inconsistencies across the canvas
- Gaming in dark environments shows distracting bright spots
- One side of the screen appears brighter than the other
What Causes Brightness Non-Uniformity?
Backlight Issues (LCD only)
- Backlight bleed, Light leaks around the edges where the backlight meets the LCD panel frame. Worse on IPS panels and visible as bright edges on dark content.
- Clouding (mura), Uneven pressure on the LCD layers creates cloudy bright spots, usually in the center. Common in larger panels and can worsen with temperature changes.
- Hotspots, Individual LEDs in the backlight array may be brighter than others, creating visible bright dots.
Panel Issues
- IPS glow, A silvery/warm glow visible in corners of IPS panels when viewed slightly off-angle. Normal behavior but varies in intensity between units.
- Manufacturing variance, No LCD panel is perfectly uniform. Some variation is normal; excessive variation is a defect.
- Physical pressure damage, Pressing on the screen or improper mounting can create permanent bright/dark spots.
How to Read Your Results
✅ Even, uniform gray across the entire screen, Your backlight is well-distributed. No significant bleed, clouding, or hotspots. Excellent for photo editing and dark content.
⚠️ Slight brightness variation at edges or corners, Minor backlight bleed or IPS glow. This is typical for IPS panels and usually only noticeable in a dark room on dark content. Acceptable for most users.
❌ Obvious bright patches, clouding, or uneven areas, Your panel has significant uniformity issues. This affects dark scene viewing, photo editing, and gaming. Check if the issue is from pressure damage, poor backlight design, or IPS glow by viewing from different angles (IPS glow shifts with angle; clouding doesn't).
How to Improve Gray Uniformity
- Reduce brightness, Backlight bleed and clouding become less visible at lower brightness settings. Set brightness to 30-50% for dark room use.
- Enable local dimming, If your monitor has local dimming zones, enable it to reduce backlight bleed in dark areas.
- Check mounting safely: do not loosen load-bearing mounting screws while the display is mounted. Follow the display and mount instructions or ask a qualified installer to assess suspected mounting pressure.
- Do not massage the panel: pressing, rubbing or tapping can worsen damage. Seek manufacturer or authorised repair advice for persistent marks.
- Temperature normalize, Clouding can temporarily worsen when the monitor is cold. Let it warm up for 30 minutes before testing.
- Warranty claim, If uniformity is severely poor, document it with photos and contact the manufacturer. Many have brightness uniformity standards for warranty coverage.
Reference results
✅ Good Result, Uniform Gray
Your entire screen should display a perfectly even, uniform 50% gray with no visible bright spots, dark areas, or color tints. The brightness should be consistent from edge to edge and corner to corner.
⚠️ Minor Backlight Bleed / IPS Glow
Slight brightness increase visible at the corners or edges of the screen. The center looks even, but the periphery shows faint lighter areas. If the bright areas shift when you change your viewing angle, it's IPS glow (normal). If they stay fixed, it's backlight bleed.
❌ Significant Clouding or Hotspots
Visible bright patches or cloudy areas across the screen, the gray looks uneven like a flashlight is shining behind certain areas. You may also see darker bands or vignetting (darkening toward edges). This significantly affects photo editing and dark content viewing.
Quick reference
| Symptom | Most likely | How to tell |
|---|---|---|
| Bright patches at edges on dark gray | Backlight bleed (LCD) | Stays in the same place when you move your head |
| Silvery corner glow | IPS glow | Changes or fades as you move your head or step back |
| Cloudy blotches in the middle | Clouding or mura | Visible on dark gray, fixed in place |
| Vertical or horizontal bands when scrolling | Dirty-screen effect | Most obvious on mid gray while content moves |
| Faint image of old content | Image retention or OLED burn-in | Run the OLED burn-in test to confirm |
Step-by-step troubleshooting
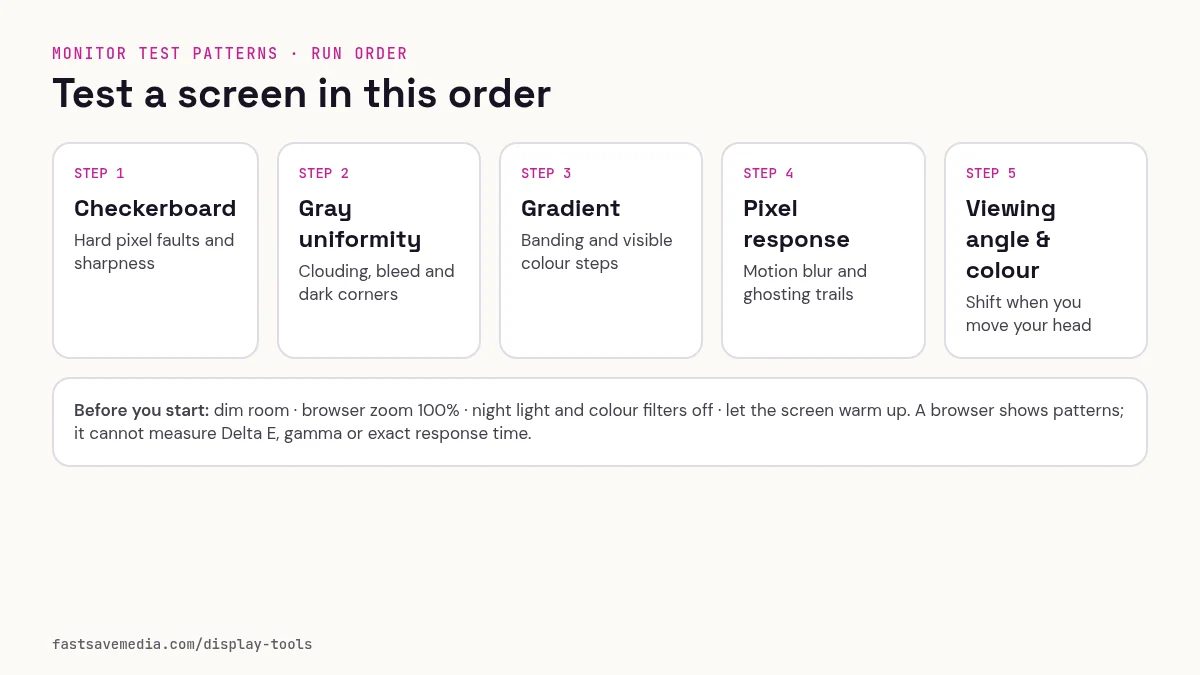
- Use a dim room and the brightness you normally use; maximum brightness exaggerates bleed.
- Show dark gray first, then mid gray and light gray.
- Move your head side to side: glow that moves is IPS glow, light that stays put is bleed.
- Take a photo only as a record; phone cameras exaggerate bleed, so judge with your eyes.
- If a new monitor shows obvious fixed bleed or clouding on normal content, contact the seller while the return window is open.